To my mind consistent and effective presentation is broadly reliant upon two basic requirements being fulfilled by the angler. The first is making the right choice of the correct lead arrangement – as this directly impacts upon the way the terminal tackle lies on (or in) the lake bed and how it avoids tangling. The second consideration, that is just as vital, is related to how the rig lies out.
Lead arrangements and when to use each one has been covered in detail many times before – essentially by knowing the type of substrate (or sediment) and the then using that as a base line you can tailor your terminal tackle to offer the best possible efficiency in terms of how it sits and how it makes your favoured hook link material lie out.
To use a very simple example, based on my own angling in the last couple of years, I have been fishing a lot in clean silt as it is the simplest way of hiding the terminal tackle and have reverted to Covert Lead Clips instead of the silt/helicopter rig as the anchor point (the lead) will not drag down the hooklink if the line tightens with undertow. Consequently, softer hooklink materials have worked better – and in order to get these to lie out a little.
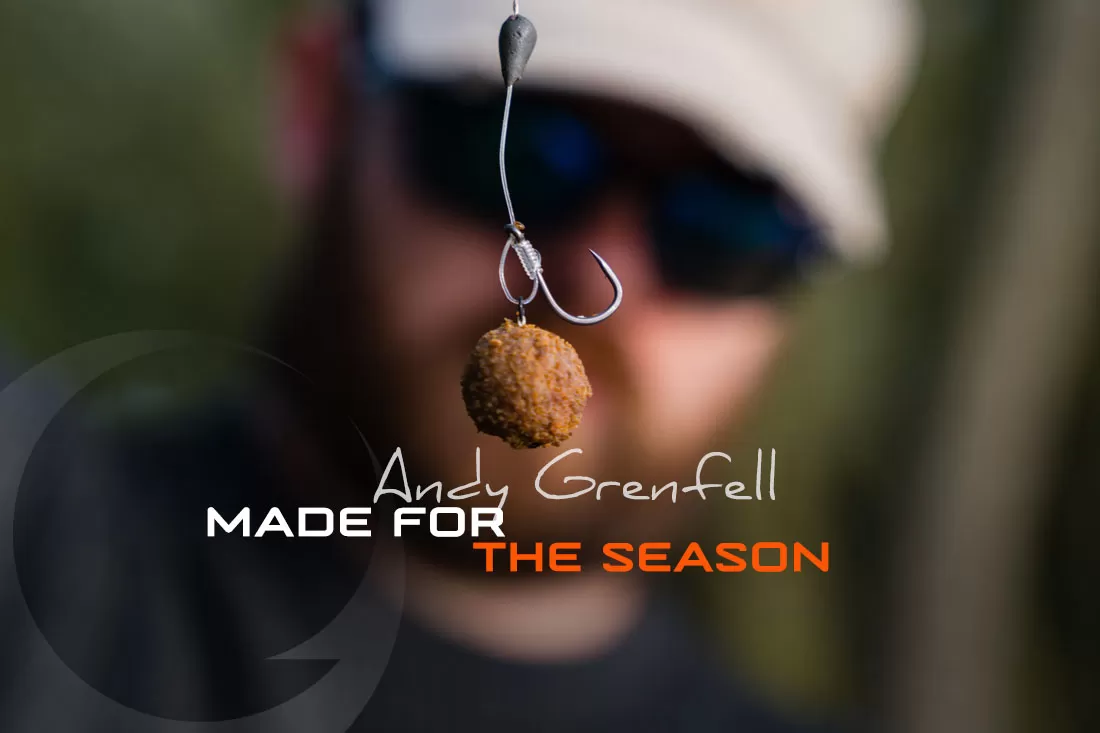
Now, I will make it completely that I’m not fixated with rigs ‘kicking out’, but I definitely think that control of the orientation of hook to hookbait is critical in maintaining consistent result – and by adding a small amount of buoyancy (preferably through a small cork ball so the boilie hookbait looks identical to the freebies) it’s easy to ensure that the hook and hookbait settle exactly how I want them to.
Rigs that work with balanced hookbaits range from simple knotless knots braided rigs through to Clone rigs and other forms of ‘D’ rig. They all have the potential to work if you fine tune the terminal arrangement to ensure that they are not inhibited or buried. The only slight issue with ‘Clones’ is that they are easier to tie using monofilament – and as described mono isn’t always the ideal hooklink if you’re fishing soft sediment.
Being a massive fan of D style hook bait arrangements I really wanted to design and create a rig accessory/component that would make it easy to tie them with skinned and braided hook links. This is how we came to design the ‘Covert Pop-Up Hook Aligner’ – though I personally rarely use it with pop ups as there is no significant weed in the lake I’m currently fishing. Instead, I prefer to use it as described, with balanced bottom baits and soft hook links – and they function superbly.
Essentially the hookbait will settle over the hook hiding it and when a fish sucks in the bait the hook will drop round and be positioned in ideally to take a strong hold. I’ve always thought that the reaction speed of any rig is vital (and this is why hooklink length has such a massive impact sometimes) as sometimes the fish can suck and blow the bait extremely quickly, and this reaction speed is enhanced by building in a slight angle into the ‘aligner’ portion of the component. Luckily, a another consequence of elongating the shank slightly is that it also helps to control the manner in which the hook lies (a bit like timing baits so they lay lengthways in the bottom).
In all things ‘riggy’ it’s all of the very small details that comes together to make your rigs work as well as they possibly can – and whether you choose to use the simplest or most complex rig it’s important that you understand why it works and how to tie it correctly.
Here’s how to tie the rig:
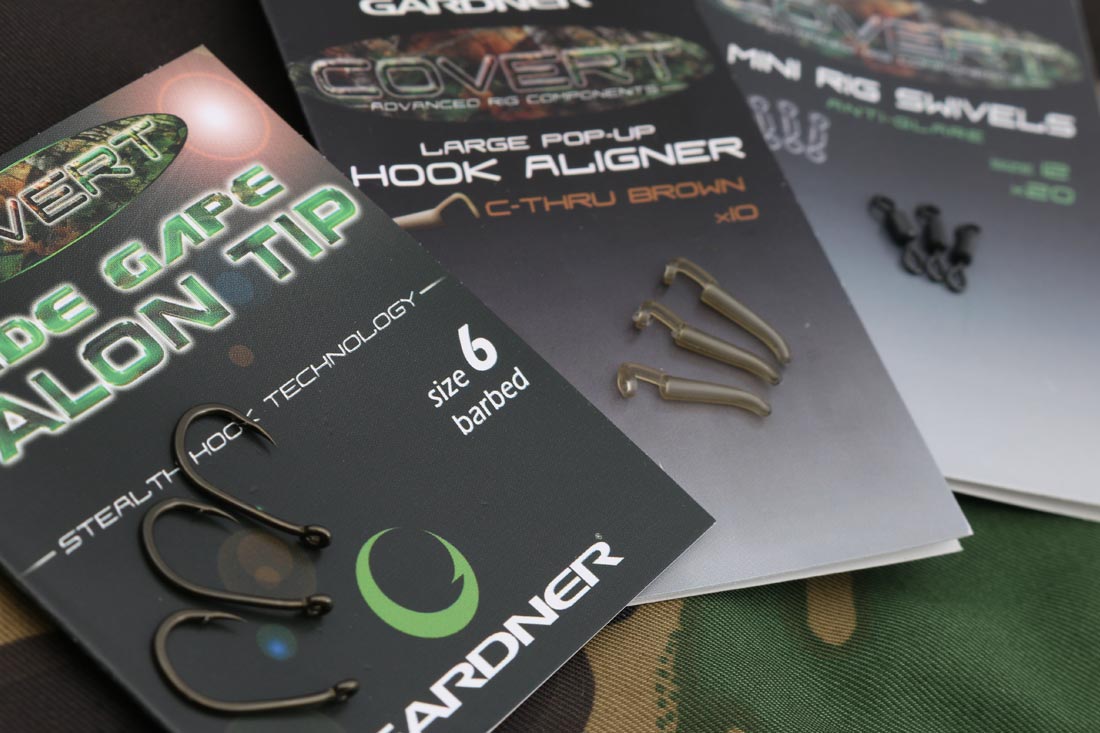
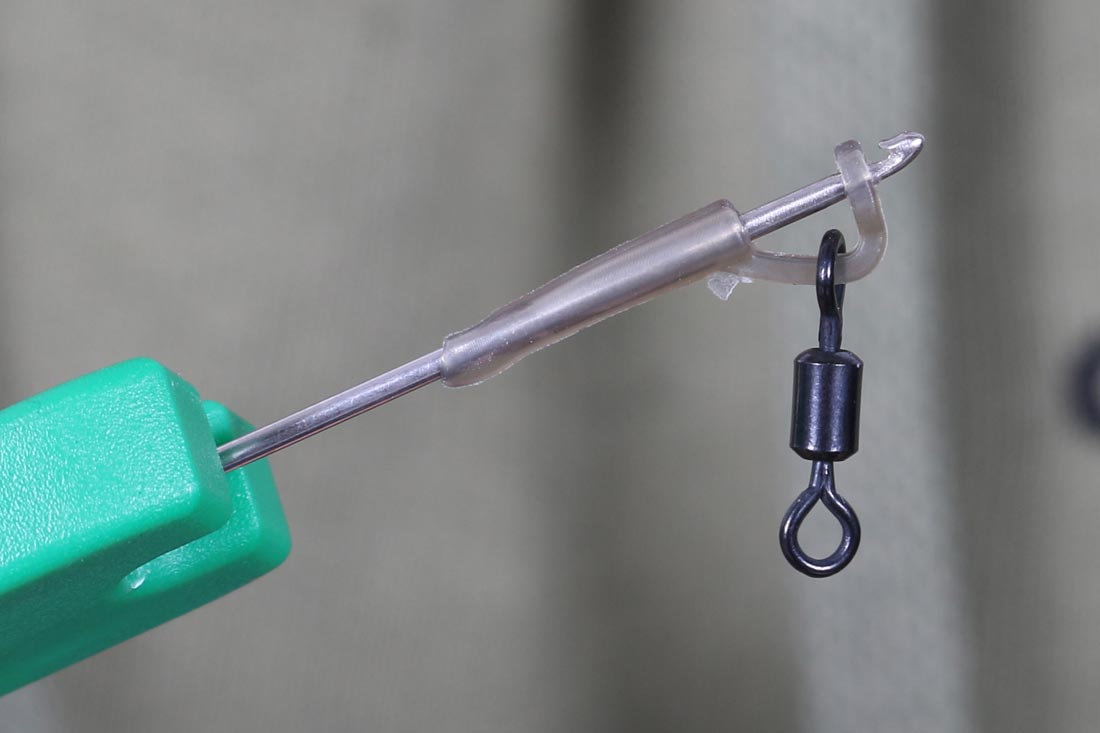
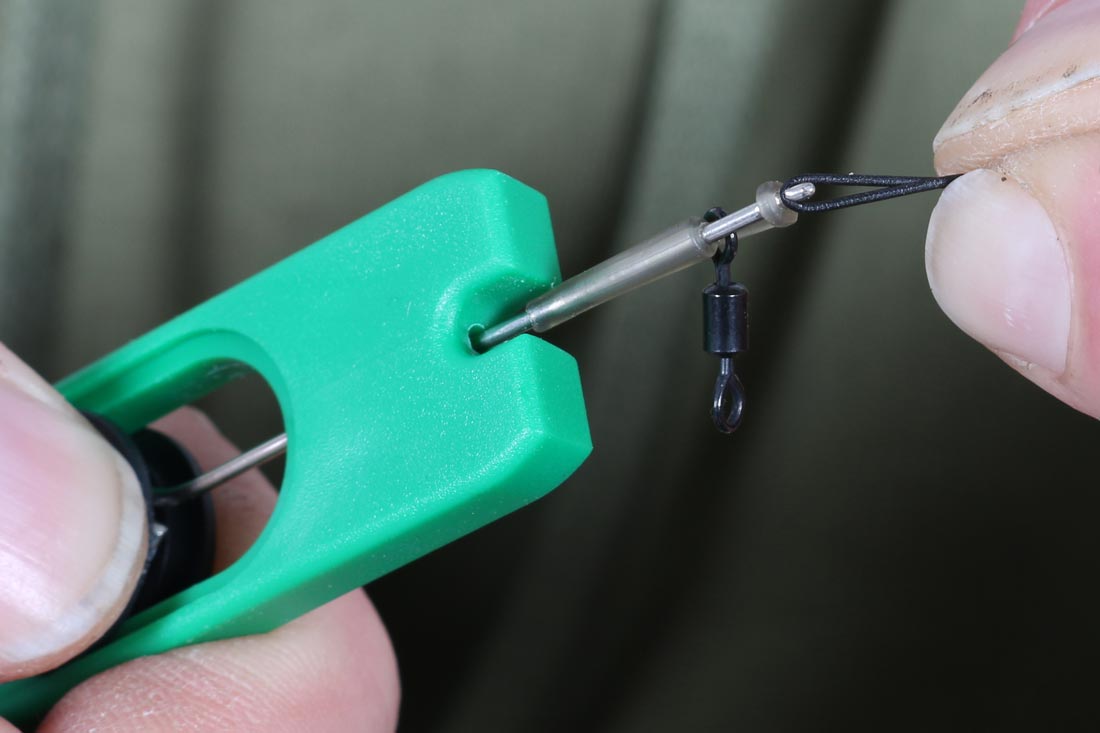
1. Mount a size 12 swivel onto a Pop Up Hook Aligner (large Hook aligner for size 6 hooks as shown).
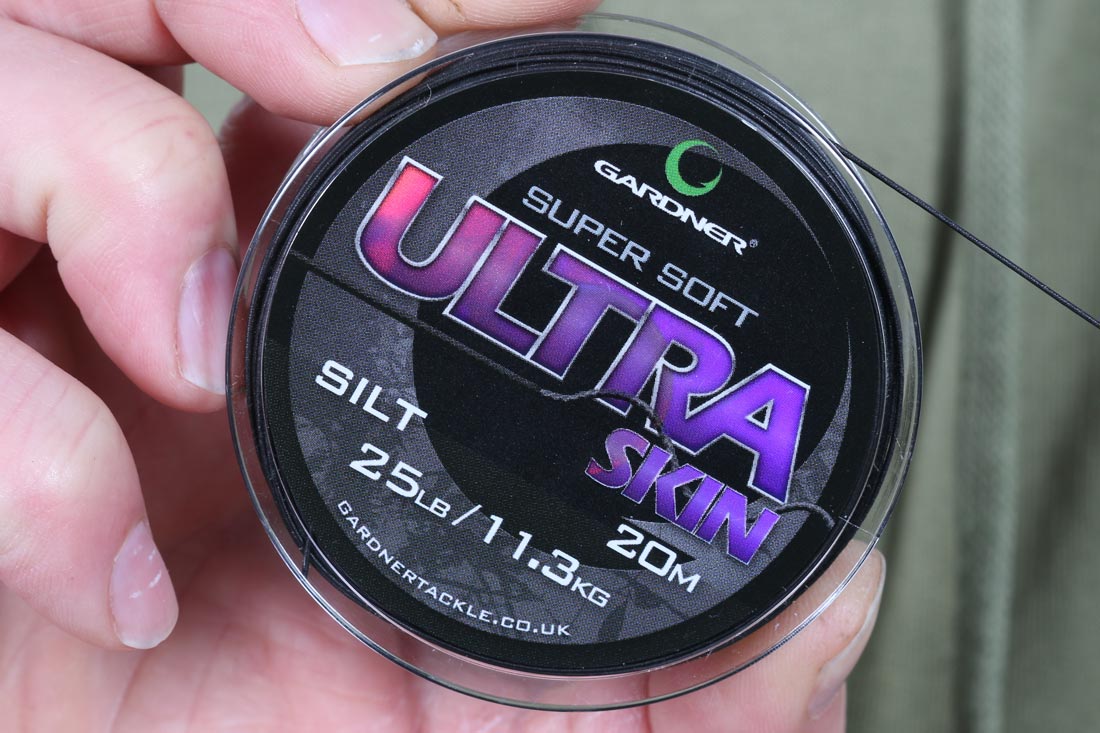
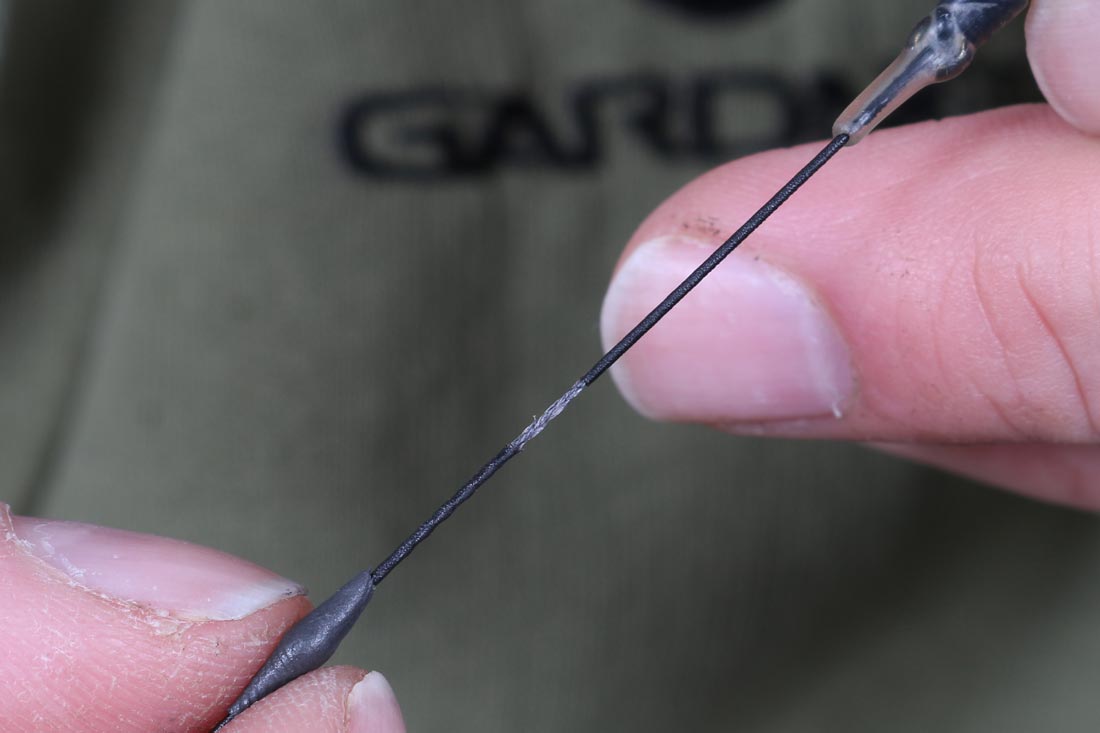
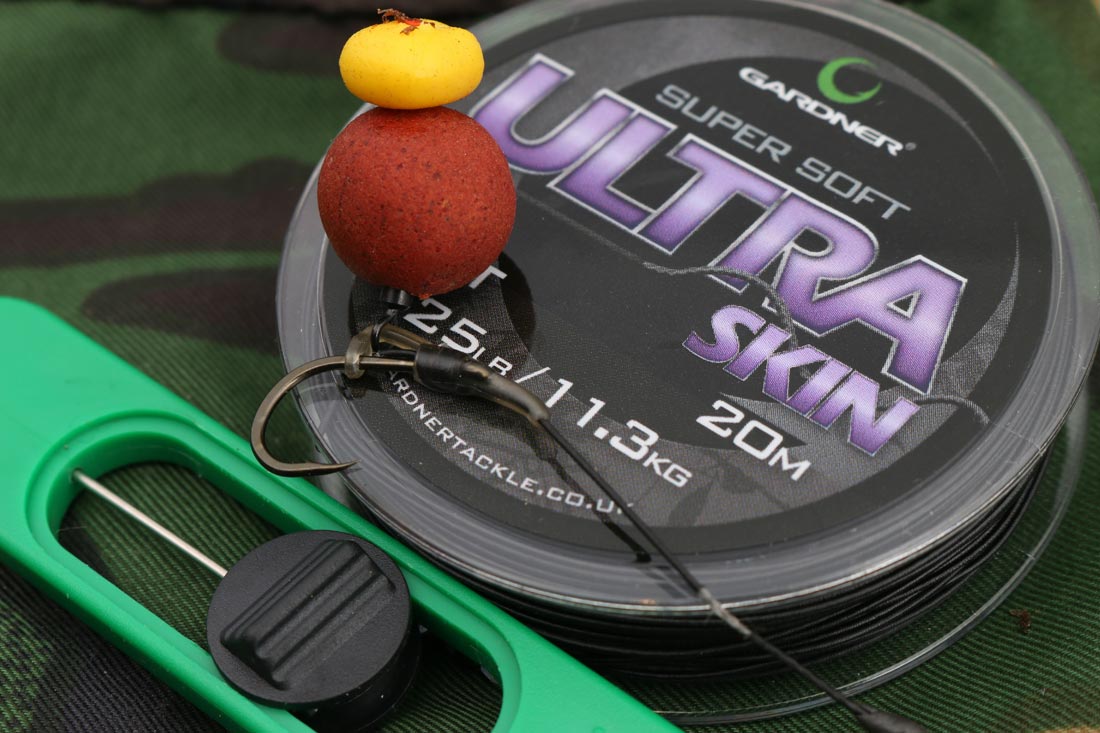
2. Take 40cm of a supple, sinking skinned hooklink – Ultra Skin is ideal.
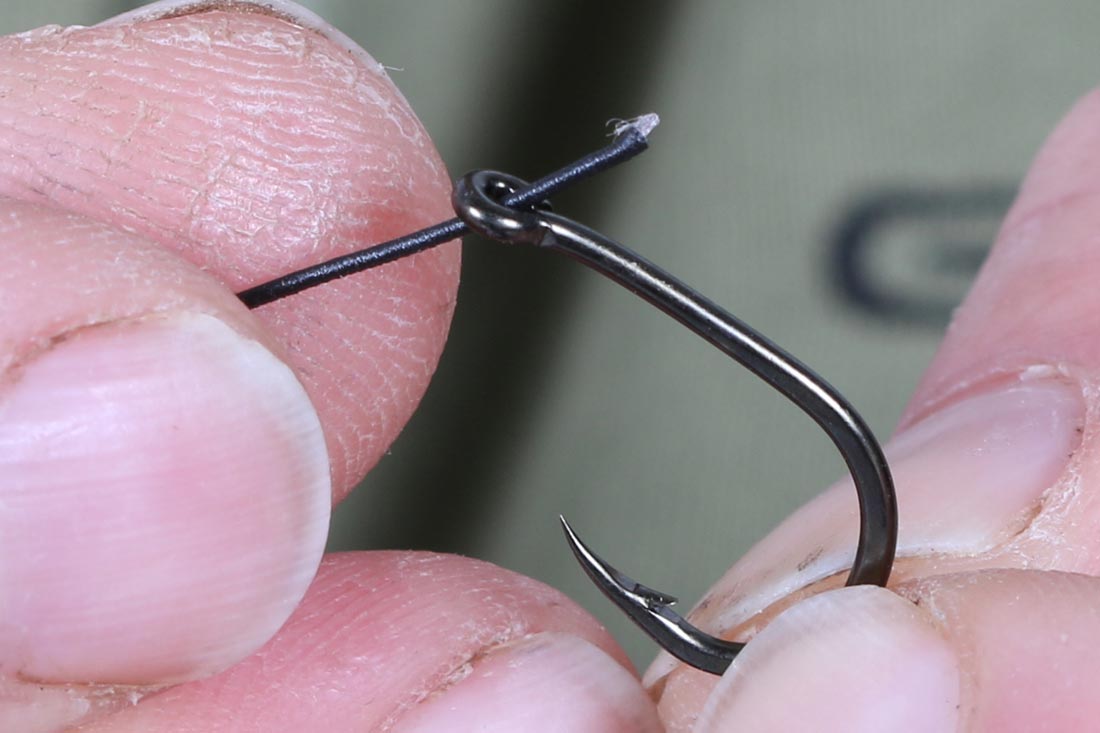
3. Don’t bother stripping it. Simply attach the hook with a simple knotless knot (5 turns is enough).
4. With the Knotless knot always have the hooklink coming through the eye towards the hook point (as shown).
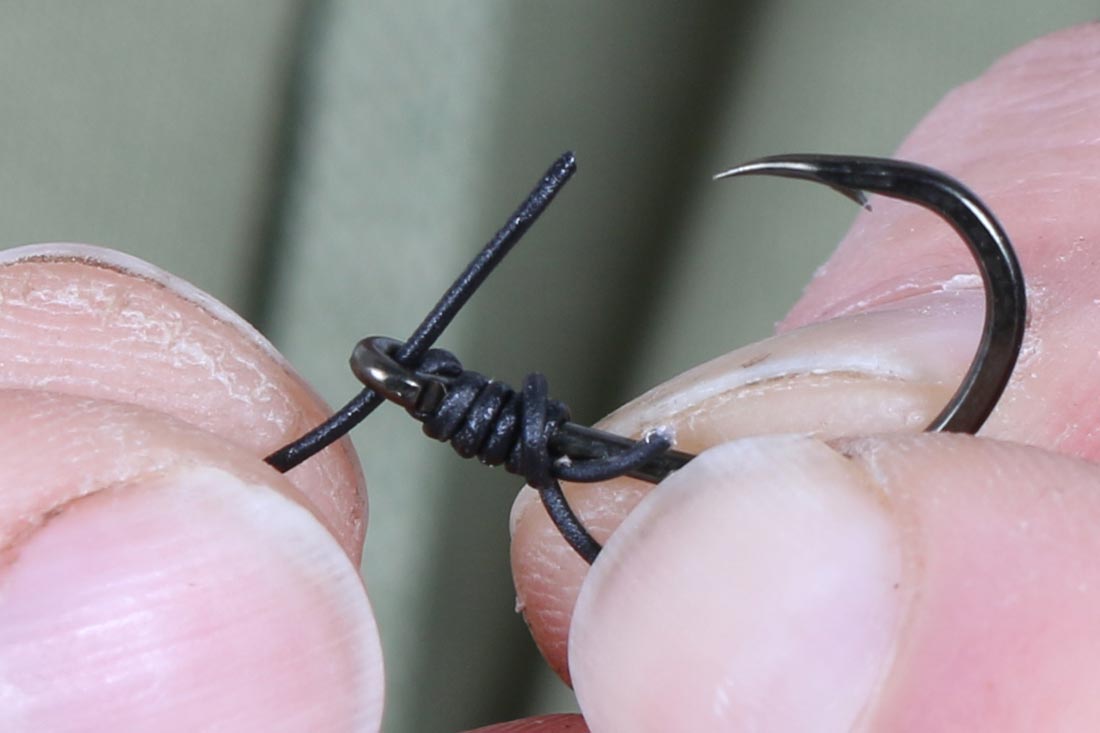
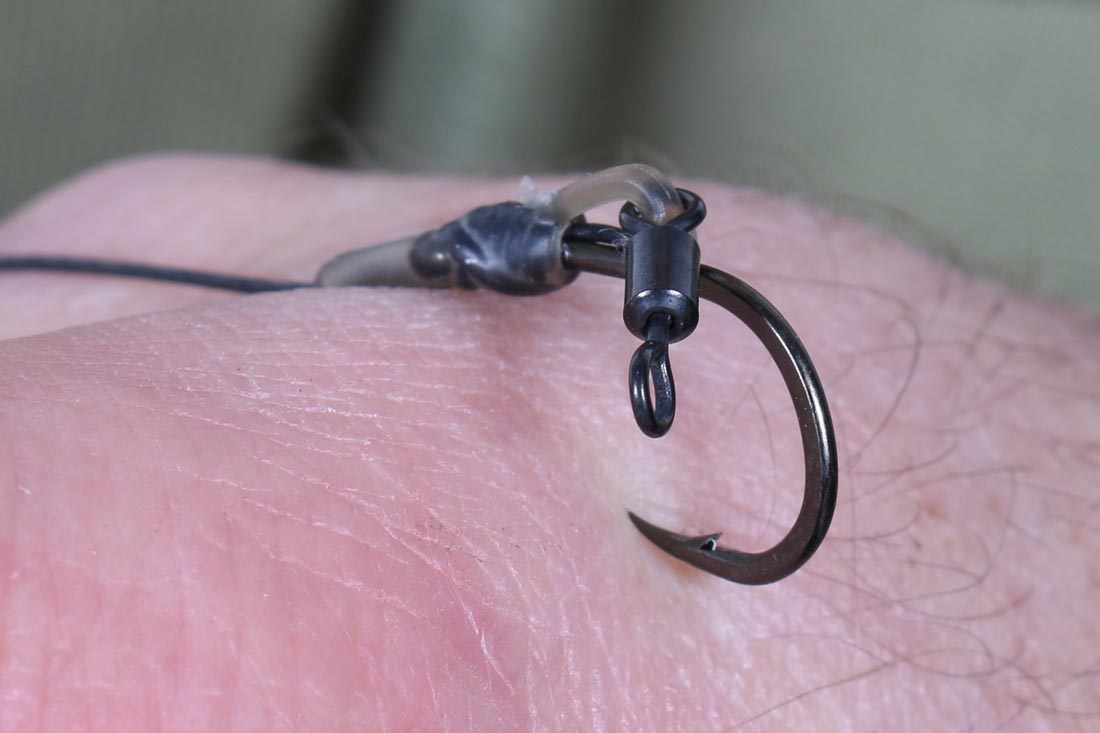
5. Using a boilie needle thread the Pop Up Hook Aligner onto the hooklink with the D nearest the hook.
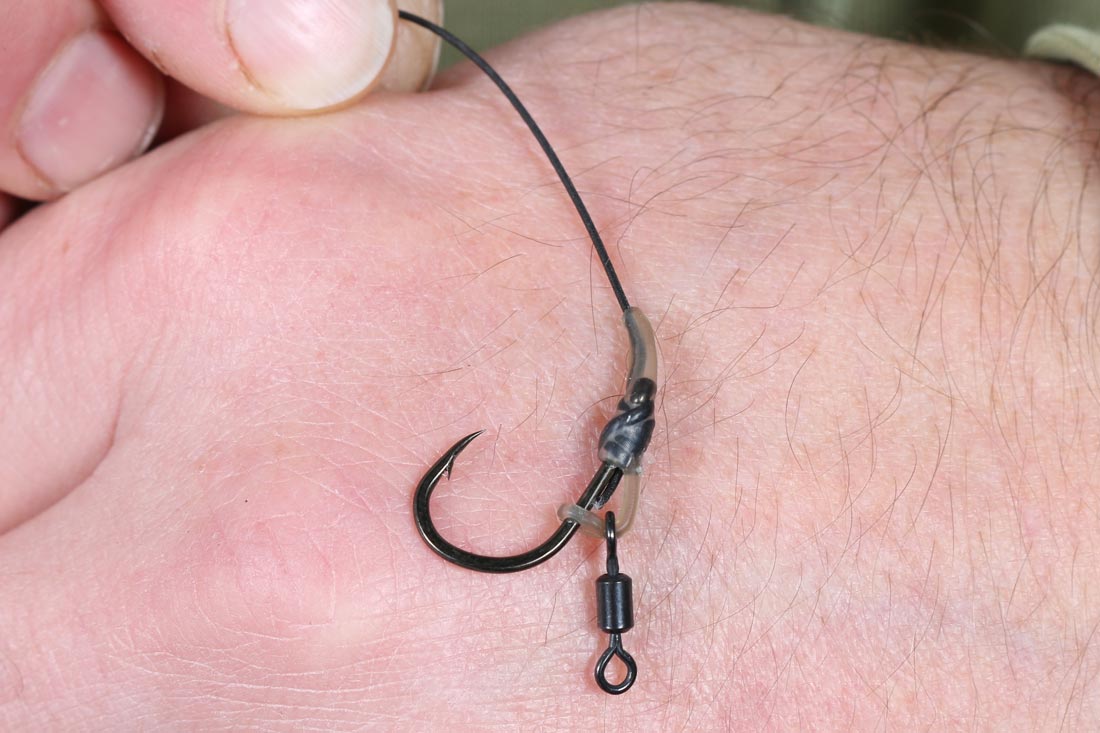
6. Carefully push the hook aligner up over the eye so that the D sits squarely on the back of the hook with the end of the D sitting at a tangent to the hook point.
7. It should look a little like this.
8. The gentle angle of the Hook Aligner helps the hook to flip more aggressively and gives better hook holds.
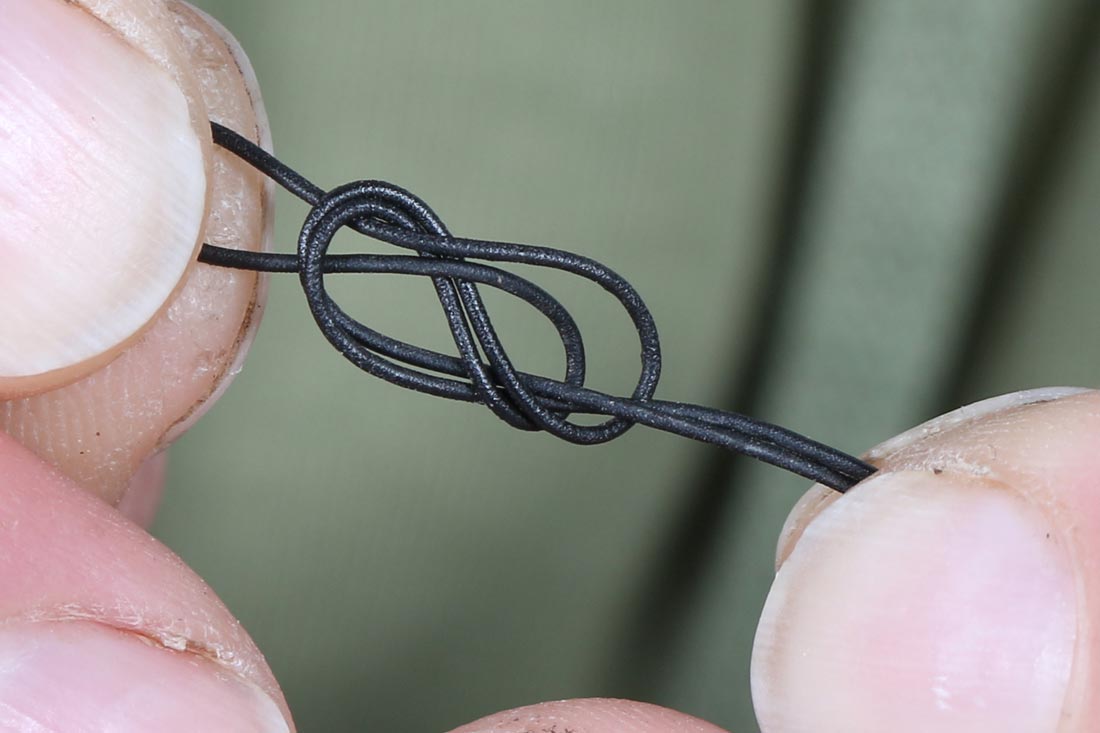
9. To attach the rig tie a fig.8 loop knot, lubricating it with saliva and then pulling it firmly down (using both tags) to bed the knot fully to ensure good strength.
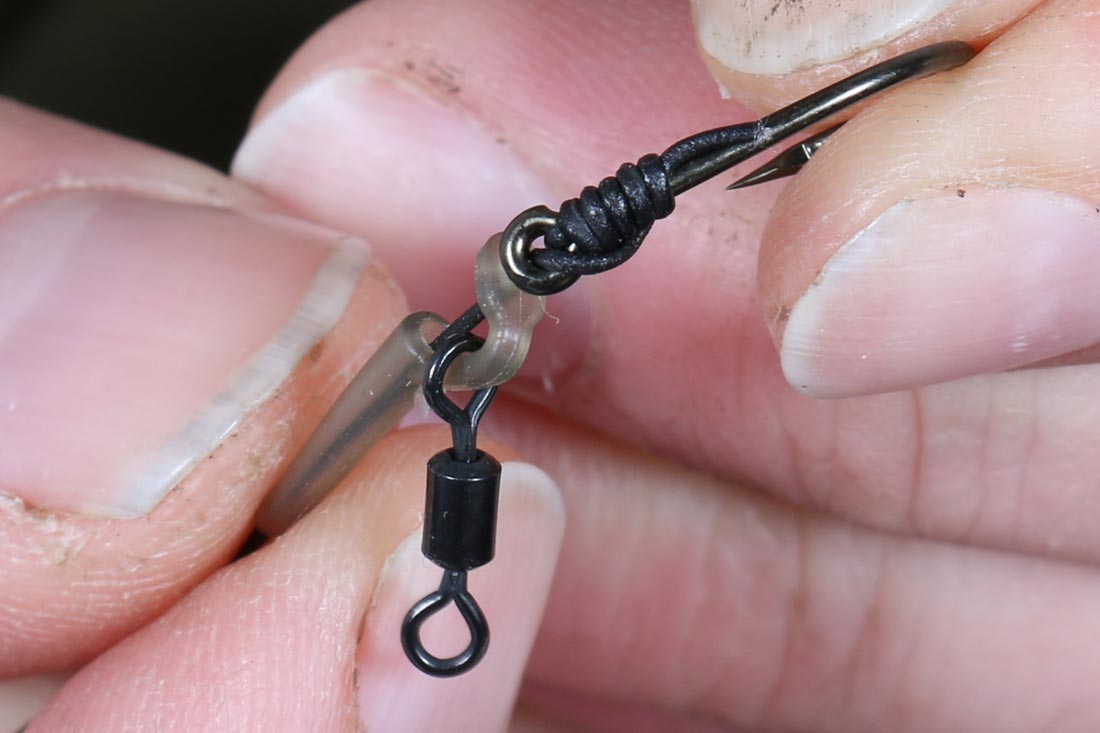
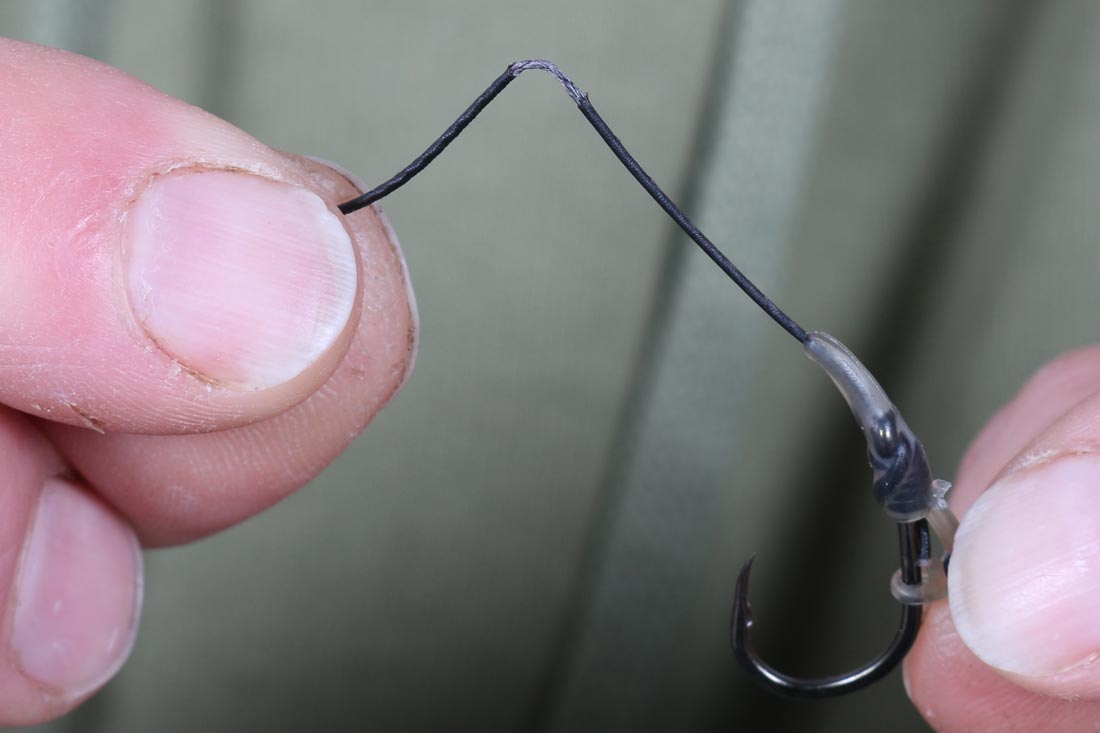
10. To further enhance the way that the hook twists remove a small section of skin 2-3cm from the hook to create a hinge.
11. Add a small amount of Critical Mass putty as shown – as the added weight helps the hook to pivot and react even faster.
Please see the rig with captions here – https://gardnertackle.co.uk/2016/09/balanced-bottom-bait-rig-pop-hook-aligner/

Leave A Comment